
Downpipe and Gutter Repairs
Downpipes and gutters are prone to leaking joints. Start by cleaning around the joint to get rid of loose dirt and paint (a wire brush is recommended if your gutters are made of steel). Repair tape is used to seal any cracks.
Check your gutters and downpipes regularly, especially after heavy rain. This can to prevent blockages caused by debris accumulation and can identify more serious problems before they arise.
Gutters
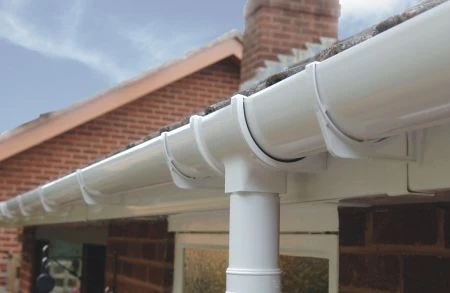
Gutters are crucial in directing rainwater away from the walls of your home but only when they're clean and functioning properly. In the event of a blocked gutter, it can overflow, infuse solid wall insulation, and cause a beetle infestation to the timber behind them. If not taken care of, they can cause damage to shallow foundations. It is essential that homeowners are able to detect problems with their gutters as well as downpipes and make repairs themselves, if they are able to.
Water leaks or rust on the edges of the gutter are typically the first indication of trouble. Metal gutters naturally get rusty over time, but when they're corroded to a point of separating from fascia hangers and astragals, it's recommended to replace them. In the meantime, you can avoid future obstructions by giving your gutters a thorough wash. Use gloves and brushes to get rid of any dirt or paint that is loose prior to beginning cleaning. Install gutter guards to stop leaves from clogging your gutters. To protect yourself you can install pipe balloons.
Downpipes can become clogged with debris, which will require regular cleaning to ensure they function effectively. If they become too full then the downpipes could overflow, causing damage to the basement walls and walls.
Over time, cracks in gutters can occur for various reasons, like corrosion or damage caused by ladders, or falling trees. Roof cement or sealant can be used to fill smaller holes, while larger ones will require a new flashing.
A gutter section that is leaking can be caused by a damaged seal or a non-sealed joint that is damaged or worn out. Cleaning the area and removing old sealant prior to applying a new layer of sealant can fix leaky gutter sections. A leaky downpipe can be repaired by cleaning the surface, removing any dirt or paint that has escaped and then applying a fresh sealant to the joint.
Downpipes
Downpipes are essential to ensure the drainage of your roof. They direct melted snow and stormwater away from your roof into a soak-well or drain to keep your home and property dry. As with gutters, they are susceptible to damage and obstructions. It is crucial to fix or replace them as soon as is possible to avoid costly damage and leaks.
The best way to detect a downpipe problem is to look for signs of rust or damage. You can also check if there are any signs of leaks by running water through the system. You'll see wet spots on your ceiling or walls in the event of a leaky downpipe. If you notice this, you need to get help from the experts.
The problem of blocked downpipes is more difficult to handle than gutter blockages because they are usually located in difficult-to-access locations. To prevent injury and damage to property, it's essential to use the right safety equipment and adhere to the proper procedure. The most frequent cause for downpipe blockages is dirt, leaves, and silt that are blown in by the wind or carried by rainwater. It can build up to the point that your downpipe is unable handle it and then overflows.
You might need to replace your downpipe if the one you currently have is damaged or rusted. It's best to choose a high-performance model, as they are made to handle higher pressures and temperatures than standard pipes and offer greater durability. They are also more corrosion resistant.
A downpipe upgrade can give your car an extra boost by boosting engine power and boosting efficiency of the fuel. It's also a great way to prepare your car for any further modifications you might want to make.
Before you install any aftermarket parts to your vehicle, talk to an expert to ensure that the parts are compatible. Some modifications may require a change in the mapping of your ECU to accommodate the new exhaust. This is essential to keep your engine from being damaged and voiding any warranties.
Astragals
Door astragals are vertical pieces that fit between two doors in order to seal the gap. RepairMyWindowsAndDoors create an obstacle to moisture, drafts and other external elements. They are often interpreted as simple weather stripping, however, they play a vital part in enhancing the comfort of your home and increasing security. Aside from their functionality astragals also add a visual appeal to door systems, and are customizable in a variety of styles and finishes as well as sizes. It is crucial that astragals be examined and replaced as required to ensure their proper performance and optimal visual integration.
An astragal is a piece of hardware that fills in the gap between the dividing edge of a pair of doors, or between a door and a flush transom panel when there is no mullion. It is also used as an air seal on fire-rated Dutch doors, or between the top leaves and bottom leaves of a sliding door. Astragals come in various sizes and materials including vinyl, wood, and plastics. They can be put in a variety configurations with overlaps or non-overlapping gaps, as well as with or without gasketing.
In addition to providing a visual barrier and increased privacy, door astragals also aid in maximizing the efficiency of your home by securing the gap between the doors and the threshold. This prevents air leakage and reduces energy costs. It also helps maintain a comfortable temperature inside. This is particularly beneficial during colder months which is when it's crucial to prevent heat loss.
Installing a new astragal an easy task that can be completed within only a few simple steps. It is important to first measure the width and height of the gap between the doors. This will ensure that the size of the astragal is correct. When the astragal is chosen and cut to size with a saw and placed on one of the doors. Installers will then find the astragal, then align the punched hole with the existing astragal, and then secure it.
Repairing the astragal by a professional is recommended to ensure the new astragal is properly fitted and is securely fixed. They can also examine other components to ensure that they are in good condition.
Flashing
The gutter's flashing is used to keep rainwater out of the place at the point where the roof meets the wall. It's possible that the water is leaking behind your gutters due to an insufficient or improperly installed flashing. This can be fixed by installing a gutter apron which is a bent piece of flashing that fits under the shingles and over a gutter. Gutter aprons are typically available in sections of 10 feet and can be cut to size with tin snips.
It's not always easy to find holes in the gutter however, they can cause a lot of harm. If you suspect that your gutters are leaking, a quick inspection using tin snips could identify the issue. Small holes can be repaired with roofing cement or sealant while larger ones require flashing.
If your gutters become clogged, water will overflow, washing debris off the fascia boards, roof tiles, wall cladding, and eventually into your home. This is particularly a problem with metal gutters that are prone to corrosion. You can help to prevent gutter clogging by regularly cleaning the downpipes. A plastic spatula is the best for this task since it doesn't scratch the gutter and can be cut to shape to match the contours of the gutter by using the help of tin cutting tools.
Gutter aprons can be an excellent way to keep the gutter from clogging by redirecting the water into the gutter. You can also put an end diverter of a downpipe to divert water away from the building or house. Installing a larger downpipe or a gutter apron, could be required if your gutters overflow following a heavy rainstorm.
If your gutters are loosened, it could be due to a broken union or an unattached screw that has become loose. Begin by cleaning the gutter to eliminate any paint or rust that is loose. The next step is to employ a wirebrush to dry the joint. Apply gutter and roof sealant to the joint with the nozzle applicator gun making sure that you fill all of the cavities. Allow the sealant time to dry before reattaching gutter hanger brackets.